How to free up space on your Mac
Short answer. Open Apple menu > System Settings > General > Storage, turn on the recommendations that suit you, and empty the Trash. Then work through the usual space hogs: old downloads, large videos and disk images, Messages attachments, old iPhone backups and apps you no longer use. Caches and Time Machine local snapshots come back on their own, so clear them last, if at all. Never delete system folders: macOS manages those itself.
The steps go from quickest and safest to most involved. Check your free space after each one and stop when you have enough. Apple's own checklist is Free up storage space on Mac.
The checklist at a glance
The figures are rough guides; yours depend on how you use your Mac.
| Step | How much it often frees | Does it come back? |
|---|---|---|
| Storage settings recommendations | Depends on what's stored in iCloud and Apple TV | Only if you turn them off |
| Empty the Trash | Whatever is in it, often several GB | Only when you delete more |
| Clear Downloads | Often a few GB, more if you keep installers | Slowly, as you download |
| Move or delete large files | Can reach tens of GB (videos, disk images) | Only if you make more |
| Keep iCloud files online | Up to the size of your iCloud Drive and Photos | Files download again when you open them |
| Messages attachments | Often several GB after a few years | Yes, as new photos and videos arrive |
| Old iPhone and iPad backups | Often several GB per device | Only for devices you still back up |
| App caches | Often a few GB | Yes, within days |
| Unused apps | From megabytes to tens of GB for games and creative apps | No |
| Time Machine local snapshots | Varies; macOS already counts them as free | Yes, about every hour |
| Developer data | Can reach tens of GB | Yes, with every build |
1. Use the Storage settings recommendations
- Choose Apple menu > System Settings, click General in the sidebar, then click Storage.
- Wait for the bar at the top to finish loading.
- Look at the recommendations above the list of categories.
Apple describes three (Apple):
- Store in iCloud moves Desktop, Documents, photos and messages to iCloud and keeps only recent files on your Mac when space is needed. It needs enough iCloud storage.
- Optimize Storage removes Apple TV films and shows you've watched and keeps only recent mail attachments on your Mac.
- Empty Trash Automatically erases items that have been in the Trash for more than 30 days.
All three are safe. Click the (i) next to a category to see what it holds; what's taking up space on your Mac explains each one.
2. Empty the Trash
Files you delete in Finder go to the Trash, and their space only comes back once you empty it (Apple). Control-click the Trash in the Dock and choose Empty Trash. This deletes everything in it permanently, so look inside first.
Two other bins are easy to miss:
- Photos keeps deleted photos and videos in Recently Deleted for about a month. Open it in the Photos sidebar and delete what you're sure about.
- Mail keeps deleted and junk messages. In Mail, choose Mailbox > Erase Deleted Items, then Mailbox > Erase Junk Mail.
3. Clear out Downloads
Downloads collects installers, disk images, zip files and things you opened once. Most of it can be downloaded again.
- In Finder, choose Go > Downloads.
- Choose View > as List, then click the Size column heading to put the biggest files first.
- Move anything you don't need to the Trash. Disk images (
.dmg) and installers (.pkg) are usually safe once the app is installed.
4. Move or delete large files
A few big files often matter more than thousands of small ones: screen recordings, exported videos and virtual machines.
- In Storage settings, click the (i) next to Documents, then choose Large Files.
- Select something you don't need and click Delete, or click Show in Finder to look first. Deleting here can skip the Trash.
To keep something off your Mac, move it to an external drive; Apple suggests this for Photos and iMovie libraries. How to find large files on your Mac covers Finder searches and Terminal commands for files Storage settings misses.
5. Let iCloud keep files online
- Choose Apple menu > System Settings, click your name, then iCloud > Drive.
- Turn on Optimize Mac Storage.
With this on, macOS keeps the full contents of iCloud Drive on your Mac while there's room, and moves documents to iCloud only when space is needed (Apple). So you may not see free space jump straight away. For Photos, open Photos > Settings > iCloud and choose the option to optimise Mac storage.
6. Trim Messages attachments
Photos, videos and voice notes people send you stay on your Mac.
- In Storage settings, click the (i) next to Messages to see the biggest attachments and delete the ones you don't need.
- To stop them piling up, open Messages and choose Messages > Settings > General, then set Keep messages to 1 Year or 30 Days.
Be careful with step 2: it permanently deletes older messages and their attachments, and with Messages in iCloud it can delete them on your other devices too. Don't delete the Attachments folder in Finder; that leaves broken conversations.
7. Delete old iPhone and iPad backups
Each local backup of an iPhone or iPad is a full copy of that device's data. Backups of devices you no longer own are pure waste.
- In Storage settings, click the (i) next to iOS Files.
- Select an old backup and click Delete.
You can also connect the device, select it in the Finder sidebar and click Manage Backups on the General tab (Apple). Keep at least one recent backup of every device you still use, unless it backs up to iCloud. How to delete iPhone backups on a Mac has the details.
8. Clear app caches
Caches are files apps keep so they load faster. Deleting them is usually safe, but they come back within days, and the app may feel slower while it refills.
macOS already clears caches and logs that are safe to delete, such as interrupted downloads and Safari website data, when space runs low (Apple). So clear one by hand only when it's huge or broken. How to clear the cache on a Mac shows how for browsers, Spotify and other common apps.
9. Uninstall apps you don't use
Games, video editors and music apps can take tens of gigabytes, and they don't grow back.
- In Finder, open Applications.
- If the app comes with an uninstaller (named something like "Uninstall [App]"), use it.
- Otherwise, drag the app to the Trash, then empty the Trash (Apple).
Storage settings' Applications list also sorts apps by size. Some apps leave data in your Library folder; don't delete folders there you don't recognise.
10. Leave Time Machine local snapshots to macOS
If Time Machine is on, your Mac saves a snapshot of the startup disk about every hour and keeps it for 24 hours. Apple says your Mac counts this space as available, and deletes snapshots as they age or when space is needed (Apple). You normally don't need to do anything.
If you must remove them, Apple's way is to turn off automatic backups in System Settings > General > Time Machine, wait a few minutes, then turn them on again. Snapshots are one kind of purgeable space; what purgeable space on a Mac is explains the rest.
11. Clear developer data
For people who write code, developer tools are often the biggest use of space: Xcode's DerivedData and simulators, Docker's disk image, and package caches such as npm and Homebrew.
The quickest safe win is in Terminal:
xcrun simctl delete unavailable
This deletes simulators for iOS versions you no longer have installed, so they couldn't run anyway. It deletes straight away rather than using the Trash. How to free up developer storage on a Mac covers Xcode, Docker, package managers and their risks.
What not to delete
- System folders, such as
/System, or anything you don't recognise in/Library. Deleting the wrong files can stop apps working or stop your Mac starting up. - System Data. You can't open it in Storage settings, and macOS manages it. Why System Data gets so large shows how to check what's inside.
- Apple Intelligence models. On macOS 27, Apple says they need up to 8 or 14 GB depending on the Mac, and Storage settings often shows more. Apple offers no button to remove them. Unofficial removal tools change system settings and may stop working after an update. See how much storage Apple Intelligence uses.
- Anything inside the Photos library in Finder. Delete photos in the Photos app instead.
Where DiskFox helps
We make DiskFox. The built-in steps work, but they mean visiting a dozen places. DiskFox's Clean Up page gathers many into one list, with how much each item frees.
- Ready to clean up lists caches and leftovers it can move to the Trash, such as browser, Spotify and Adobe media caches and application logs.
- More options holds things that need a closer look: files in Downloads of 50 MB or more you haven't touched for 90 days, old iPhone and iPad backups, and developer files such as Xcode DerivedData and package caches.
- For Docker and Messages attachments, DiskFox gives you step-by-step instructions instead of removing them itself. For Time Machine local snapshots, its System Data page can ask Time Machine to thin them, after you confirm.
Nothing moves until you review and confirm. Almost everything goes to the Trash, so you can put it back; the exceptions are Xcode simulator runtimes and unavailable simulators, which Xcode's own tool deletes permanently. Delete from Trash Now… then empties only the items DiskFox just moved, not the rest of your Trash. In Explore > Applications, you can see each app's size with its data, when you last used it, and uninstall it along with the support folders you choose.
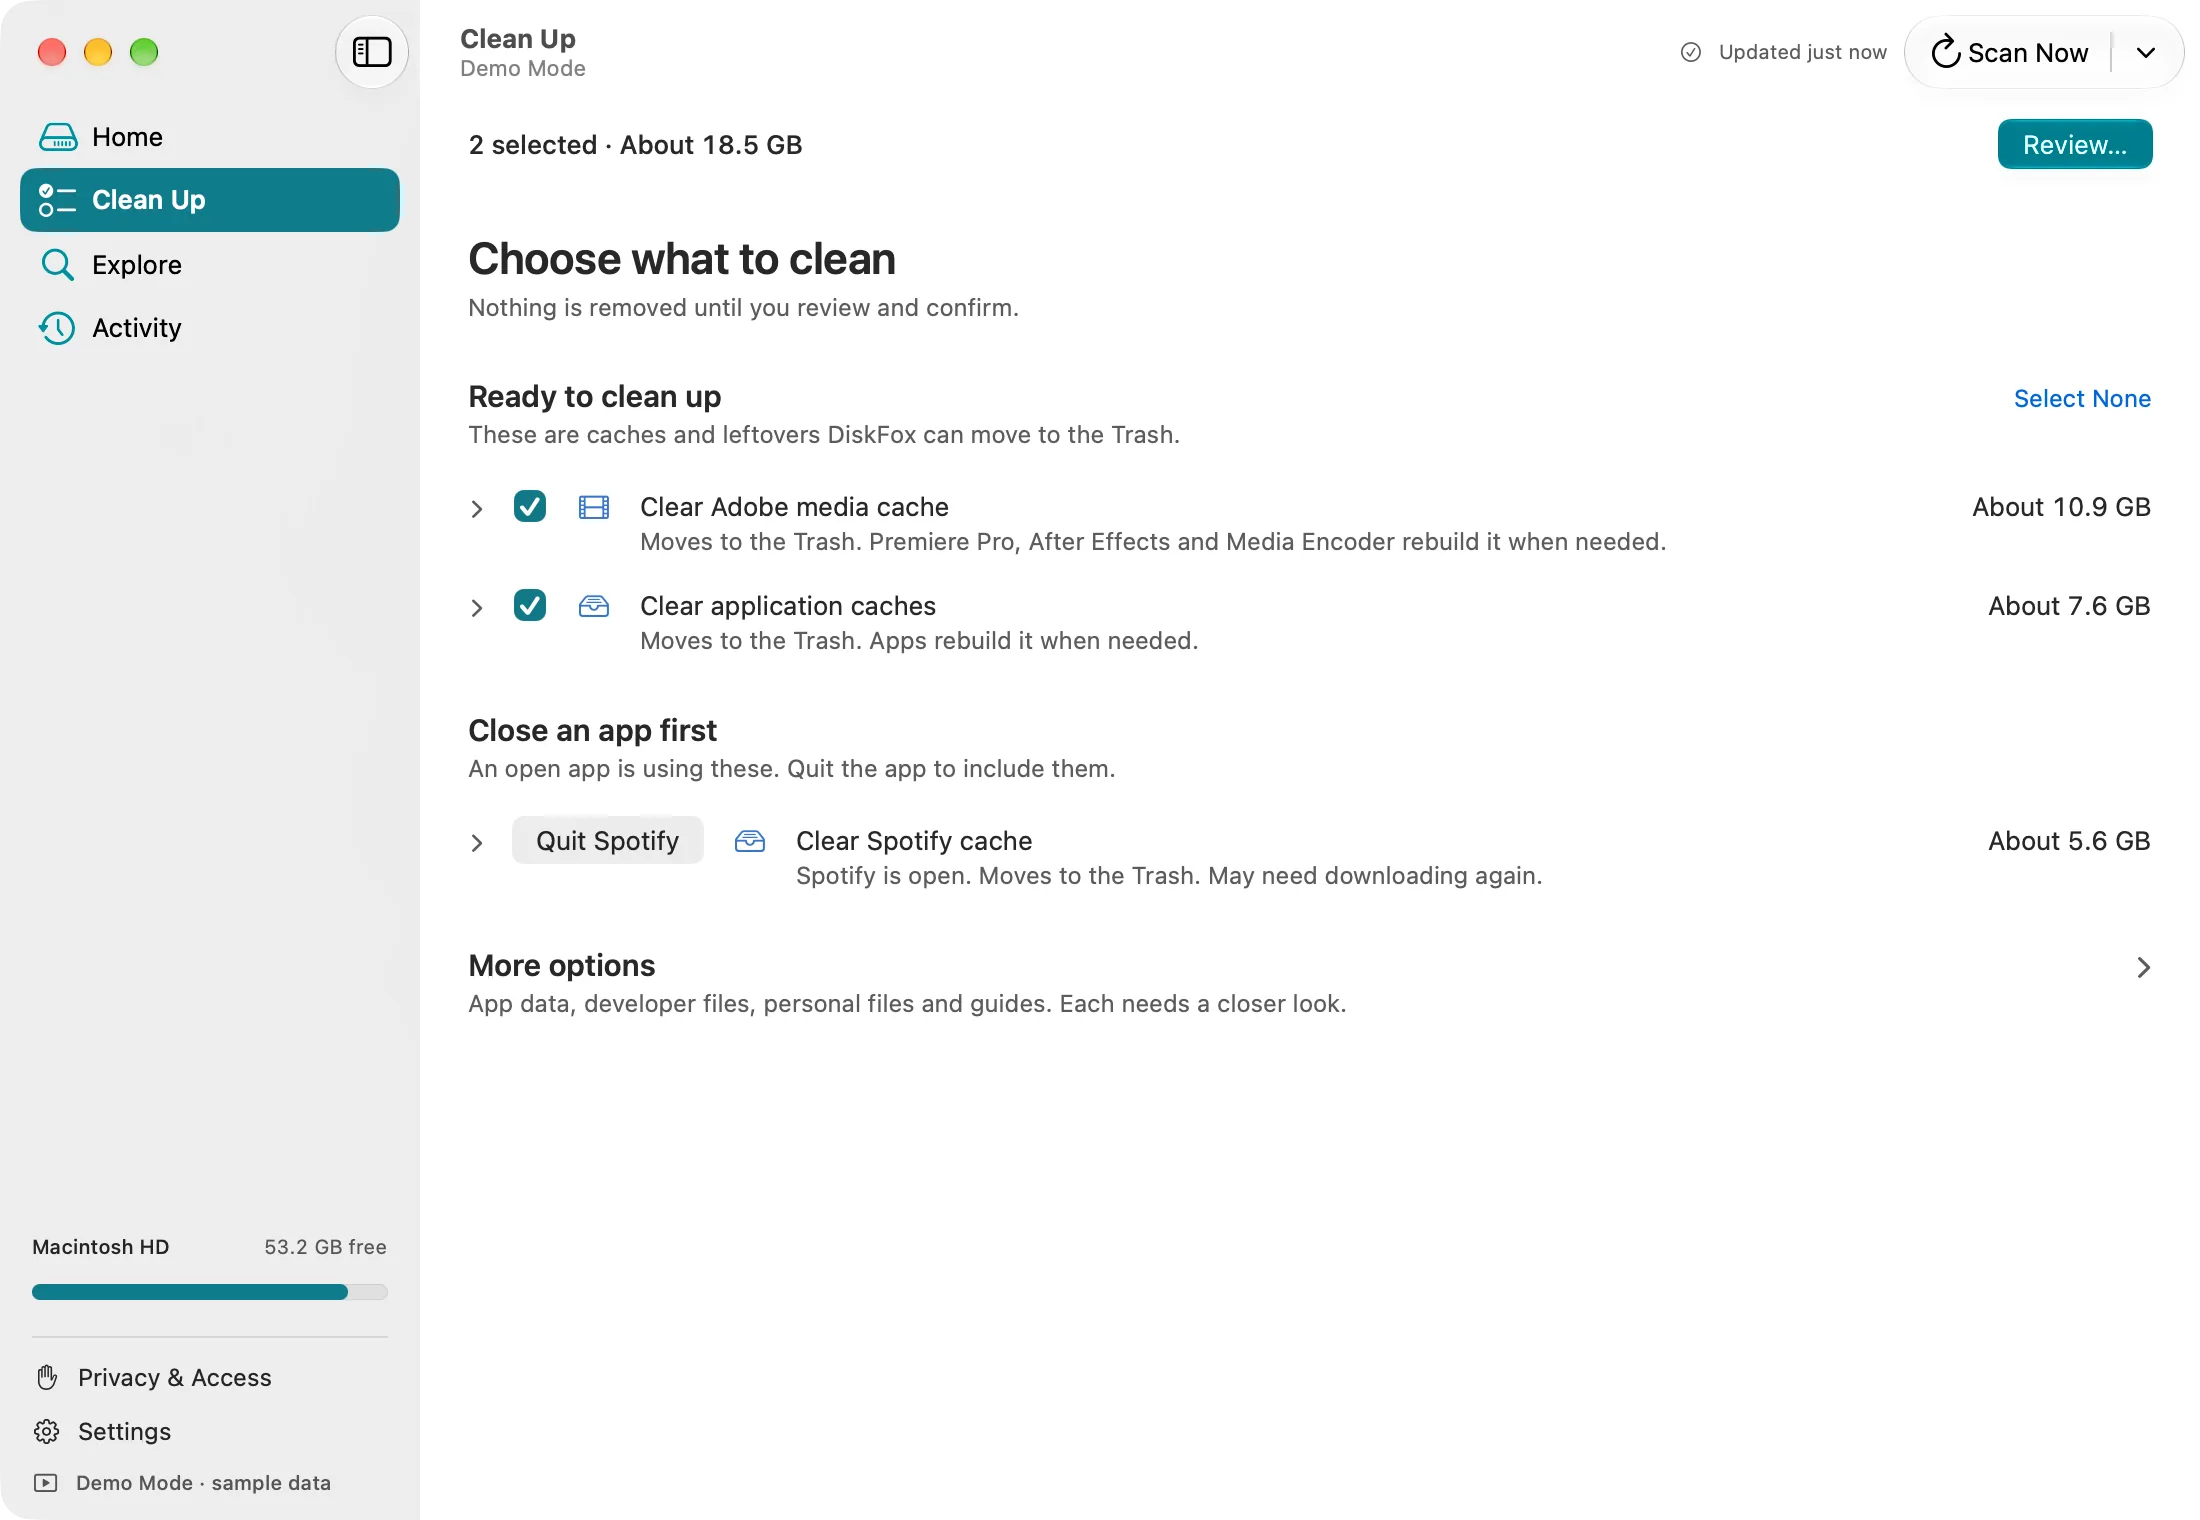
DiskFox's Clean Up page in Demo Mode, with sample data.
It has limits. It has no disk map, measures the startup disk only, checks only while it's open, and needs macOS 14 or later. iPhone backups and Messages attachments need Full Disk Access, which is optional. It's a one-time purchase with a 14-day free trial, no card needed. More on the Mac storage cleaner page.
If your Mac is still full
- Space came back within days? Something is refilling it. See why Mac storage keeps filling up.
- System Data is the biggest category? Read why System Data gets so large.
- Need room right now for a macOS update? Apple suggests starting up in safe mode, which clears some system caches. They're recreated later, so this only helps for a while.
Whatever you remove, the space only comes back once you empty the Trash.