How to find large files on your Mac
Short answer. The quickest built-in way is Apple menu > System Settings > General > Storage, then the (i) next to Documents, where Large Files lists big files you can sort by size. For more control, search in Finder with a File Size rule, or run
find ~ -type f -size +1Gin Terminal. Move what you don't need to the Trash, and empty it once you're sure.
This guide is about finding individual big files. If you don't yet know which part of your Mac is full, start with what's taking up space on your Mac.
Method 1: Large Files in Storage settings
- Choose Apple menu > System Settings, click General in the sidebar, then click Storage.
- Click the (i) next to Documents.
- Click Large Files. Click Size at the top of the list to sort by size, or Last Accessed to find files you haven't opened in a long time.
- Select a file and click Show in Finder to see where it lives before you decide.
The Downloads button shows your Downloads folder the same way, and File Browser lets you browse folders with their sizes.
Clicking Delete here can remove a file straight away rather than moving it to the Trash. If there's any chance you'll want it back, use Show in Finder and move it to the Trash instead.
This view mainly covers your own documents, so big files inside app data may not appear. Finder search and Terminal look further.
Method 2: Search in Finder by file size
- In Finder, choose File > Find.
- Next to Search:, click This Mac, or the folder's name to search only that folder.
- In the row of search rules, click the first pop-up menu (it usually says Kind) and choose Other….
- Type "size" in the search field, select File Size and click OK. Tick In Menu first if you want it in the pop-up menu next time.
- Set the rule to is greater than, type a number and choose MB or GB. 500 MB is a good place to start.
- Choose View > as List and click the Size column heading to put the biggest files first.
A few things help:
- Finder search leaves out system files by default. To include files in Library folders, click the + button to add a rule, choose Other…, pick System files and set it to are included.
- Click Save to keep the search as a Smart Folder in the sidebar. It updates itself, so you can check it every month or so.
- Finder search relies on Spotlight, so it can miss folders Spotlight doesn't index and files tucked inside packages, such as the Photos library.
Method 3: Sort one folder by size
When you already suspect a folder, such as Downloads, Movies or Desktop:
- Open the folder and choose View > as List.
- Click the Size column heading.
- Choose View > Show View Options and tick Date Last Opened to add that column. Big files you haven't opened for a year are good candidates.
Folders show "--" in the Size column until you tick Calculate all sizes in the same View Options window.
Method 4: Find large files in Terminal
Terminal is in Applications > Utilities. These commands only list files. They don't move or delete anything, and you shouldn't add -delete or rm to them.
find ~ -type f -size +1G 2>/dev/null
This searches your home folder (~) for files (-type f) larger than 1 GB (-size +1G). 2>/dev/null hides "Operation not permitted" messages for folders Terminal isn't allowed to read. It can take a few minutes, and macOS may ask whether Terminal can open your Desktop, Documents or Downloads. If you say no, those folders are skipped.
find ~ -type f -size +500M -exec du -h {} + 2>/dev/null | sort -h
This finds files over 500 MB and shows how much space each one actually uses, biggest last. If a file looks much smaller here than in Finder, it's probably stored only in iCloud or is a "sparse" file such as Docker's disk image. Deleting it frees less than its listed size.
find ~/Downloads -type f \( -name "*.dmg" -o -name "*.pkg" -o -name "*.zip" -o -name "*.iso" \) -size +100M -mtime +90 2>/dev/null
This lists disk images, installer packages, zip files and ISO images over 100 MB in Downloads that haven't changed in 90 days. For downloads, the last change is usually the day you downloaded them.
Stick to your home folder. Big files outside it mostly belong to macOS, and you shouldn't delete them.
Big files that are easy to miss
iPhone and iPad backups. A backup is a folder of thousands of small files, not one big file, so a search for large files won't show it, even when it takes tens of gigabytes. Check Storage settings under iOS Files instead.
Virtual machines and containers. Docker Desktop keeps everything in one large file, Docker.raw, inside ~/Library/Containers. Parallels, UTM and VirtualBox keep each virtual machine as a bundle or folder of very large files. Remove what you don't need from inside the app, or with docker system prune for Docker. Deleting the file itself throws away everything inside it.
Video exports and screen recordings. Finished exports of projects you've already shared often sit in Movies, Desktop or Downloads.
Old installers and disk images. Once an app is installed, its .dmg or .pkg file in Downloads isn't needed.
Xcode archives. Each archive in ~/Library/Developer/Xcode/Archives is a folder, so file searches show its parts rather than the total. Remove old ones in Xcode's Organizer window, and keep archives of builds you've released if you need their crash reports.
Videos in the Photos library. Large videos can sit inside the Photos library. Delete them in Photos, never from inside the library in Finder.
Deciding what's safe to delete
Ask these questions about each file:
- Did you make it or download it? Files in Desktop, Documents, Downloads and Movies are yours to judge.
- Can you get it again? Installers, films from the Apple TV app and anything you can download again are low risk.
- Is there another copy? If this is the only copy of something you might want, back it up to an external drive or cloud storage first.
- Is it inside Library, an app or a library package? Files inside
~/Library,.photoslibrary,.fcpbundleand similar packages belong to an app. Remove them through that app, or leave them alone. - Don't know what it is? Leave it. Search for its name first.
Never delete files in /System, /Library or other folders outside your home folder unless you know exactly what they are.
Use the Trash, then empty it
- To remove a file, select it and choose File > Move to Trash. You can put it back if something stops working.
- Space comes back only when you empty the Trash. In Finder, choose Finder > Empty Trash. If you're unsure, wait a few days first.
- Avoid Delete Immediately, which appears in the File menu when you hold the Option key. It skips the Trash and can't be undone.
- Freed space can take a while to show up. Local Time Machine snapshots can hold on to deleted files until macOS removes the snapshot, which it does by itself when it needs space. Our guide to why System Data gets so large explains more.
- A copy made with Finder's Duplicate on the same disk can share space with the original, so deleting one copy may free little.
Duplicates: exact copies vs similar files
Exact duplicates are identical byte for byte, such as the same installer downloaded twice or a folder copied to a second place. You can safely remove all but one, as long as the one you keep is where you'll look for it.
Similar files aren't duplicates: an edited photo and its original, the same video at two qualities, or several drafts of a document. Deciding which to keep needs you, not a tool. For photos, the Duplicates album in the Photos sidebar finds duplicate photos and videos and lets you merge them. Photos keeps one and moves the rest to Recently Deleted.
Where DiskFox helps
DiskFox's Explore page does the same job without the Terminal commands:
- Largest Files scans your home folder (Scan Home Folder) or folders you pick (Choose Folders…) and lists the 200 biggest files over 1 MB, with where each one is. You can pause and resume the scan. Tick the files you don't need, review them, then choose Move to Trash, or Delete Permanently, which asks you to type DELETE to confirm.
- Duplicates finds exact copies only. It compares files of 1 MB or more by size, then by a SHA-256 checksum, then byte for byte. Keep One, Select the Rest keeps the newest copy, and one copy of each set always stays. Hard links and files stored only in the cloud are skipped. Files are compared on your Mac, and their contents never leave it.
It won't find similar photos or different versions of a document, and deciding whether a file is safe to delete is still up to you.
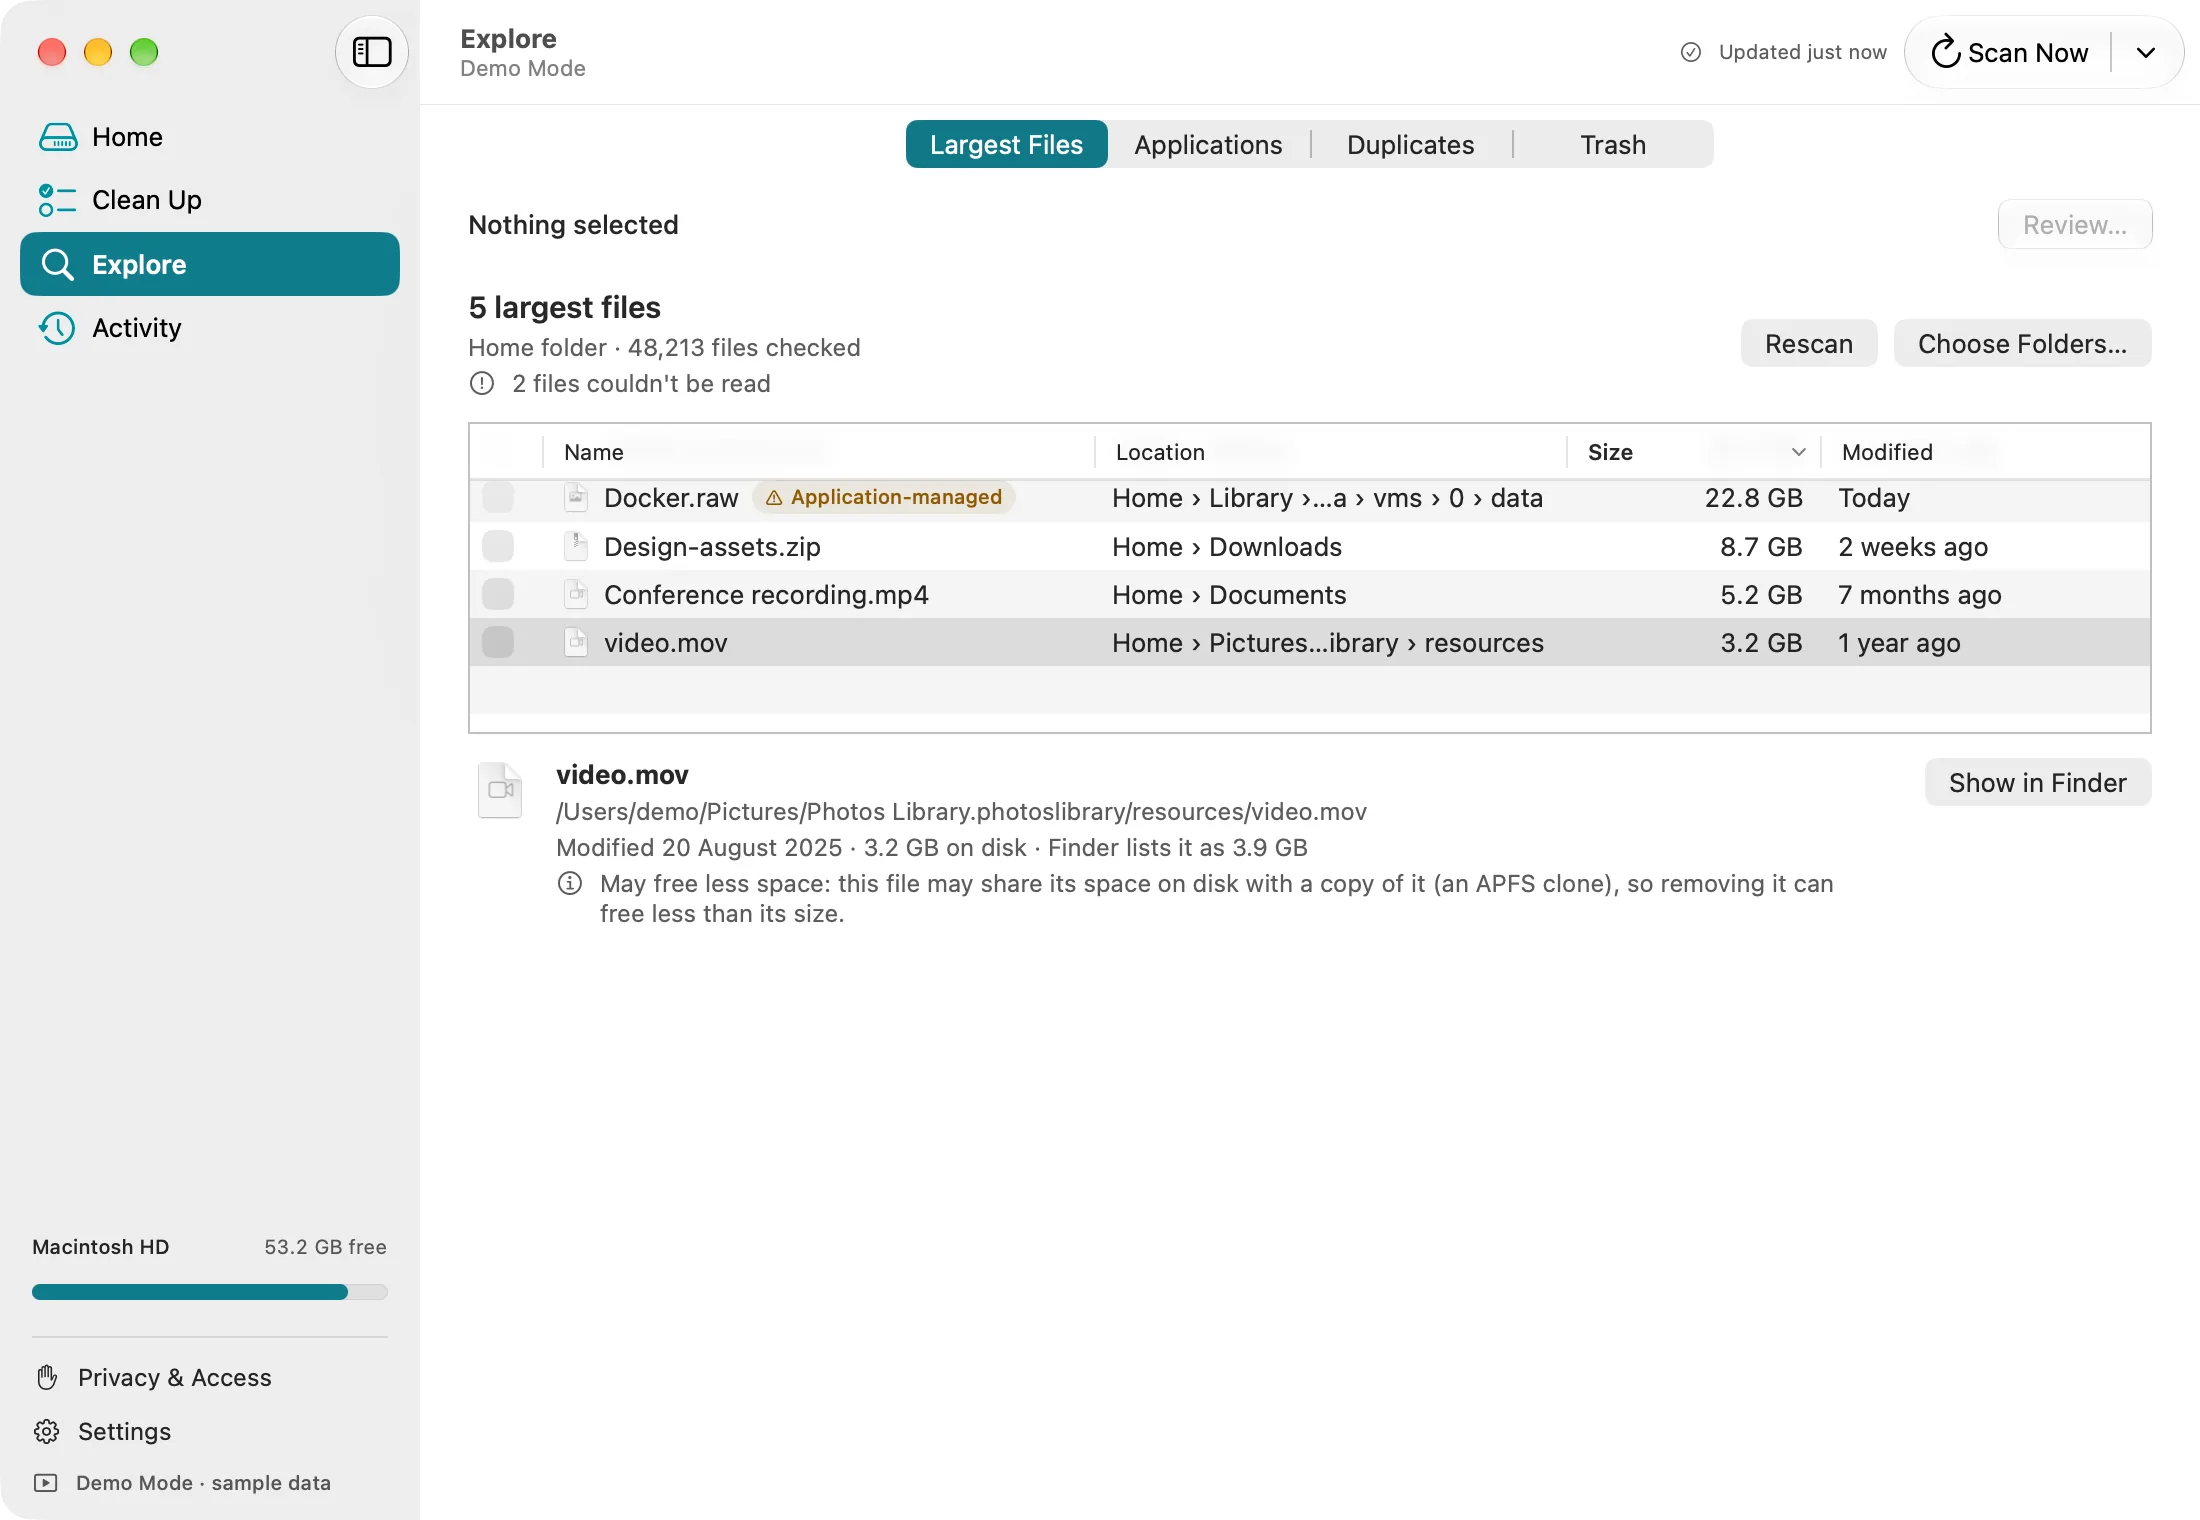
DiskFox's Largest Files list in Demo Mode, with sample data.
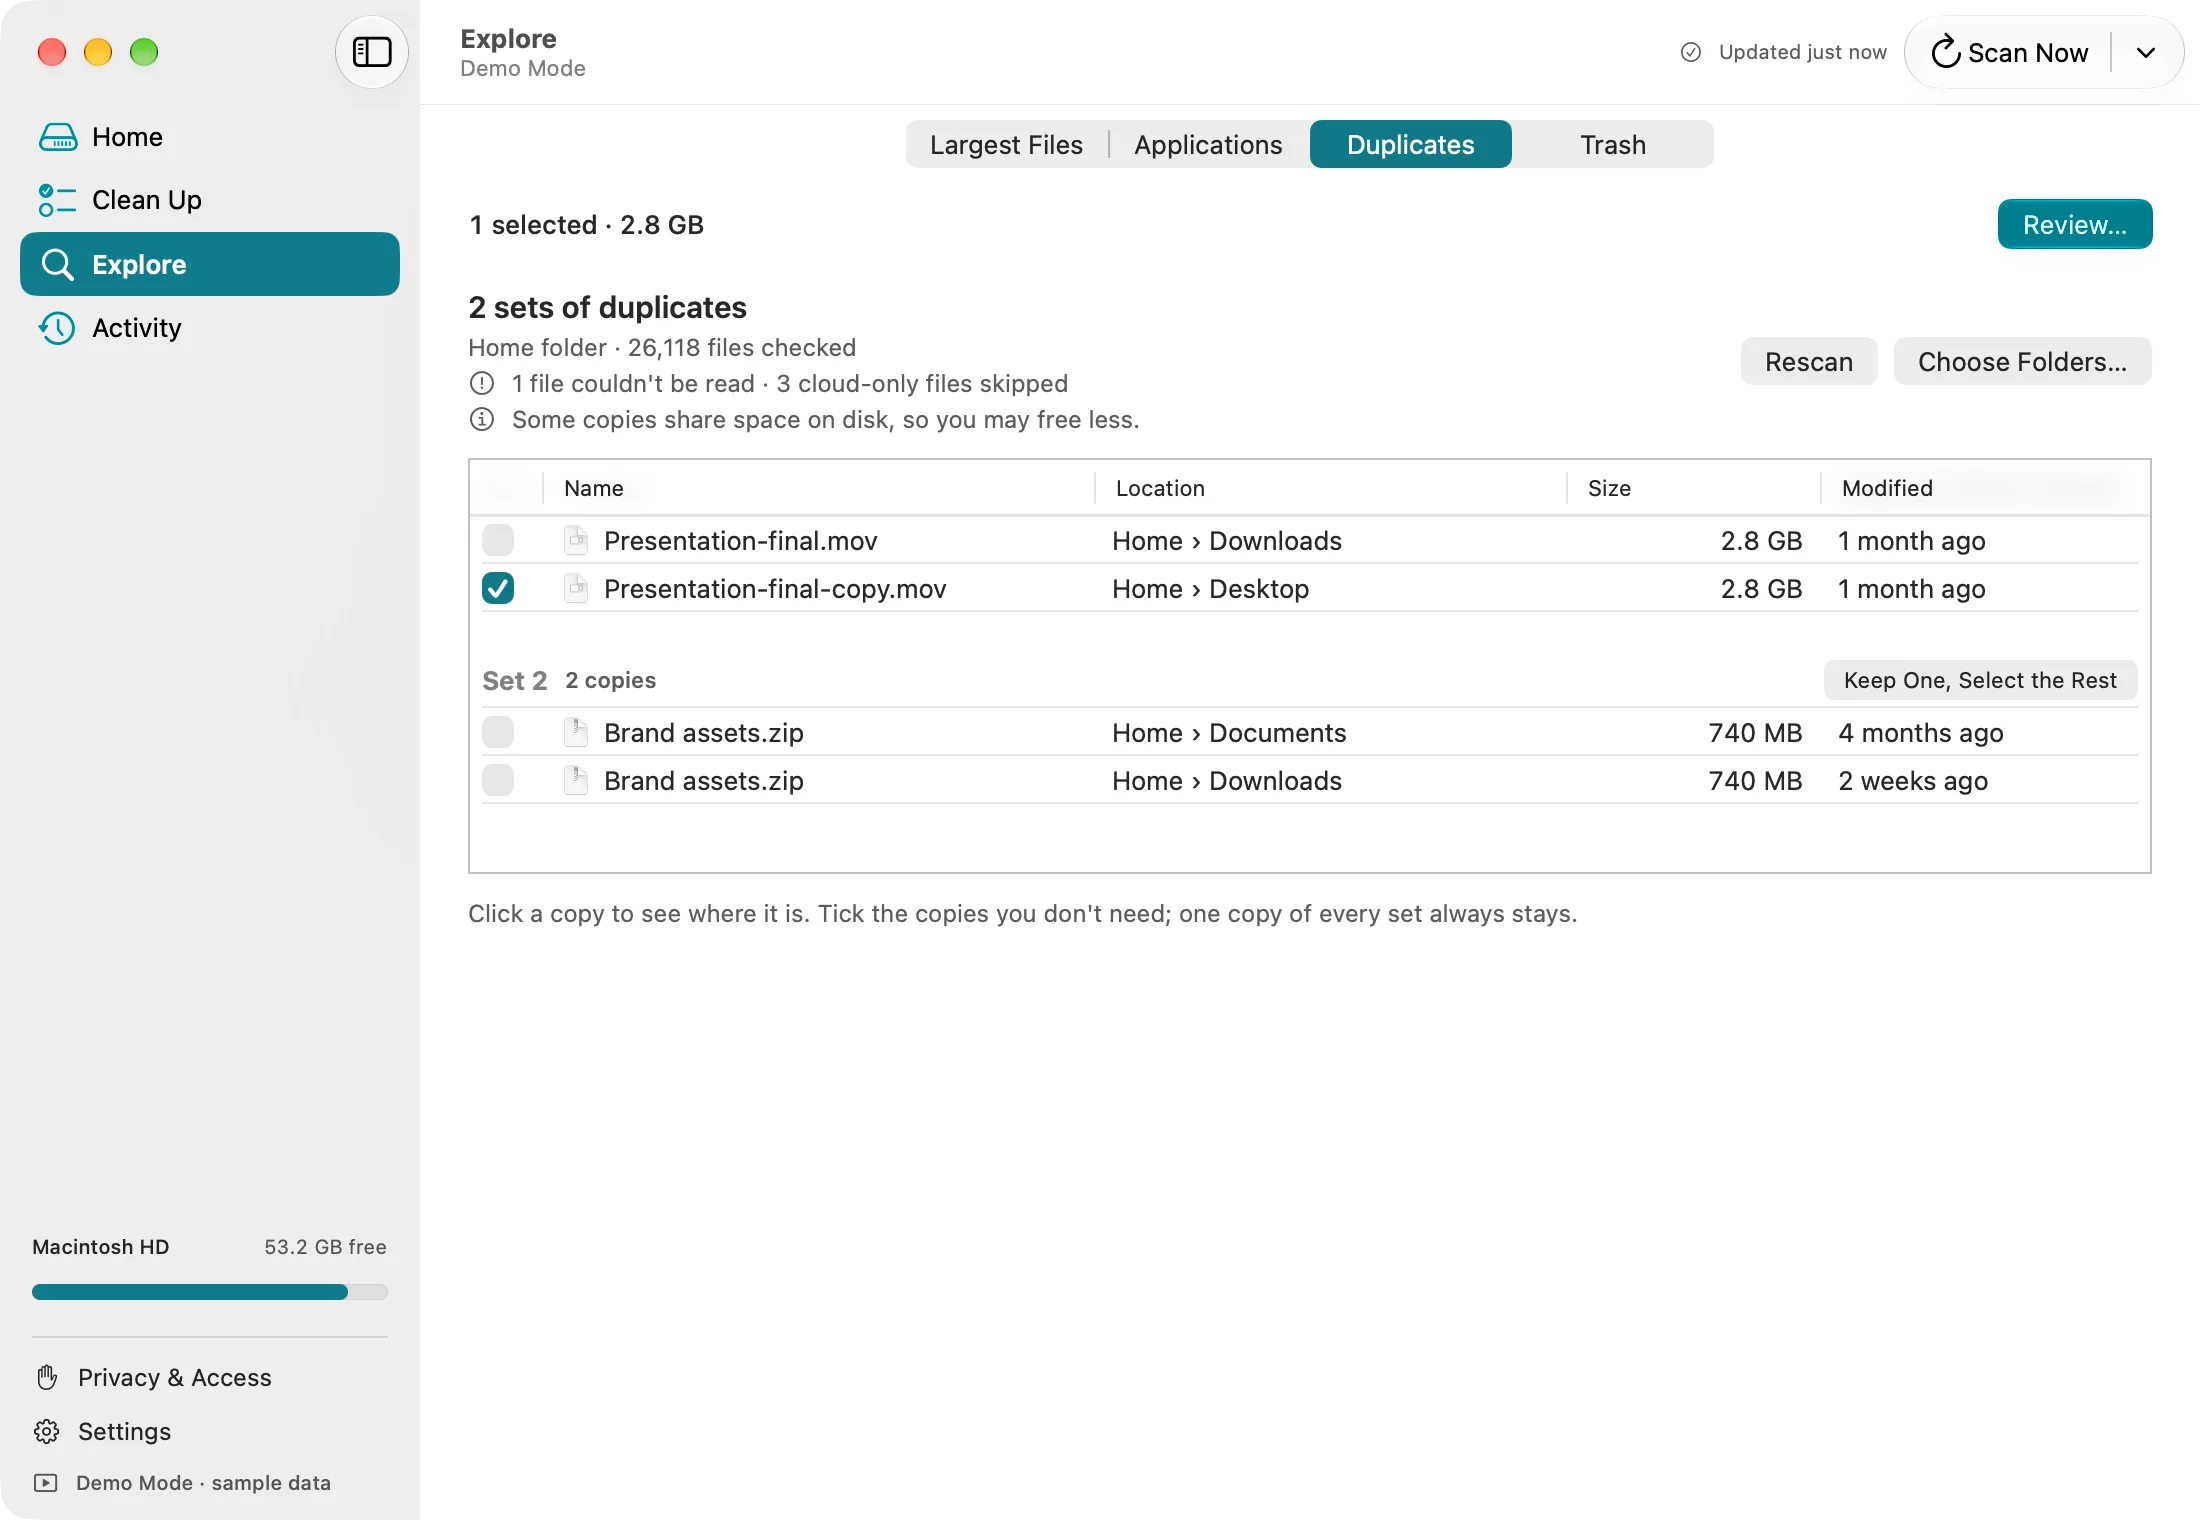
DiskFox's Duplicates list in Demo Mode, with sample data.
What to do next
- If no single file explains the problem, look at whole folders and categories in what's taking up space on your Mac.
- If you'd rather use an app, compare options in the best Mac storage analyzers or read how DiskFox's cleanup works.
- Once you've moved files to the Trash, empty it to get the space back.